Building a Laminated Stem for Large Boats
 arge clear timber is getting hard to come by. This simple technique will cost you about $100 in tools, glue and jig material and give you a rock solid stem with a perfect shape. In years gone by, boat plans called for stems that were typically made from sawn timber in multiple pieces, and the pieces were glued together and assisted with through bolts. Words like rabbett and knee are seldom used on newer plans when referring to the stem. In fact most stems today are made from inner and outer stem pieces. The inner stem is actually the integral part of the hull where the outer stem typically includes the cutwater and has a primary function of protecting the bow of the boat.
Not only are these two piece stems easier to build with, they are typically much stronger than a traditional stem. If your boat plans are for building a plywood boat, it is almost a given that you will be using this technique. Outer stems and cutwaters vary greatly from boat to boat so for the purpose of this discussion we will be talking about the lamination of the inner stem.
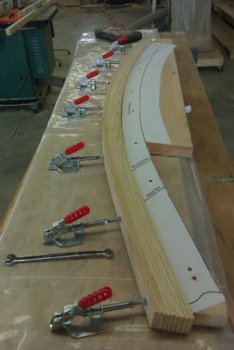
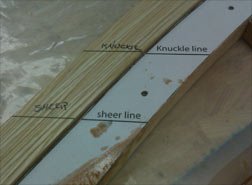
Before you begin, you will need a template for the stem. You should have received this with your boat patterns. If you chose not to get patterns with your boat or if they were not available, you will have to loft one out now. In our example, we will be using piston clamps. Typically available for about $10 each and for the stem of our 18' boat, we used 7 of them.
You will also need to have your lamination strips at the ready and some epoxy and filler. We typically use wood flour for our all purpose glue filler, but there are alternatives on the market. In order to determine the size of your strips, you will need to know the depth and width of your stem as well as the length. Strips should be no thicker than 1/4" unless you plan on steaming them. We keep them under 1/4" to avoid that necessity. Always cut your strips longer than what you need so that you can trim them down after the stem is laminated.
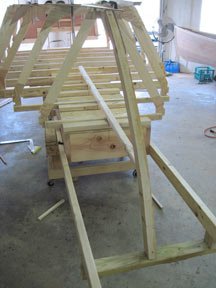
 First we need to build the jig on which we will be laminating. Because we are using piston clamps, we need a solid table on which to screw them down. We also need a piece of dimensional lumber large enough to cut the pattern from. In this case we are using an 8' piece of 2" X 8" pine board. Using carpet glue, spray the back of the pattern and lay it out on the lumber. Use a band saw or jig saw to cut out the jig. The jig will need to be firmly secured to the table, however your stem is typically wider than a 2" board and you will want your clamps to hit the center of the stem so think it all through and make the necessary spacers to fit under the jig to get it to the right height. This may require you to raise both the clamps and the jig to get the right height depending on your hardware. This may sound a little confusing, but the general idea is you want your clamps to hit the middle of the stem you are laminating and you want the stem to be well backed.
 Once your jig is all set up, it is pretty much anti climatic from here. Simply paint epoxy glue on all applicable sides of the strips and clamp them down. I would highly recommend that your table is covered in plastic and your jig is covered in painters tape so that there are no issues pulling the stem off when it is dried. Remember that epoxy is not like carpenters glue, it neither requires nor benefits from a tight clamp. You do not want to squeeze out all of the glue. Clamp it firm, you are not looking for gaps here, but if you are grunting to push that clamp in place, then you are clamping too hard. While clamping the stem in place, be sure to take a hammer and scrap piece of wood and bang the stem blank flat on the table.
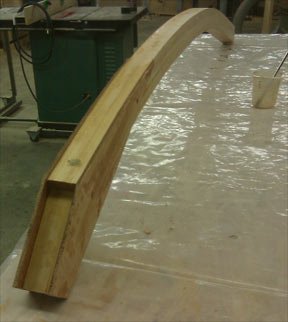
Once the stem blank is dried, it should be a simple matter of releasing the clamps and pulling the stem away from the jig. If you have a surface planer, run the blank through on both sides to clean it up. Remember that you have a width you need to keep so only set the depth to clear excess glue. don't get greedy here, use a sander for final clean up.
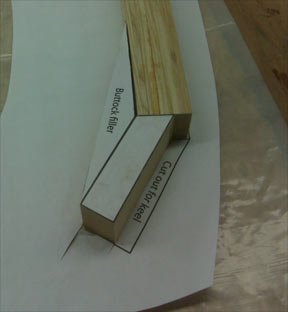
 You should notice by now that you have an amazingly rigid stem blank that you could drive over with a truck without so much as a creek. There is still a bit of work to do here. Even though you don't need a traditional stem foot with bolts pieces of the stem together, you likely still need the transition piece which allows you to connect the stem to the rest of the boat. These could be glued and bolted into place, however we choose to glue and use buttock plates for our boats. You'll notice that we have paper templates for those shown in the picture here. If you don't have these you will need to make your own. These pieces are typically cut from dimensional lumber, however if you don't have dimensional lumber thick enough, you can glue up the pieces that you need. It definitely helps to have a second clean pattern for your stem here to trim and align all of the pieces. Once that is done, liberally spread epoxy on all pieces and connections and attach your gussets.
At this point, the only thing left to do is carefully transfer any important information from the pattern to the actual stem and do your final clean up of the stem. Once all that is done you are ready to attach your stem o the boat, but that is a whole different article.