Building Scuppered Canoe Gunwales
Adding a little dash to your Canoe!
 Even if your canoe plans don't specifically call for them, you would be surprised just how easy it is to add a little flair to your canoe or rowing craft. Scuppers not only add to the looks, they also serve a purpose. when you flip your boat over it gives the water a way to exit the craft. Scuppers on bigger (trailered craft) are pretty much just for looks. As most of you know, when it comes to building your own boat, there is nothing wrong with doing something just for looks.
First a little disclosure before we start making our scuppered gunwales. All of the gunwales we have here at our shop whether we are using them here or sending them out to customers are cut by machine out of long pieces of Ash. Although this is preferable, making them as outlined in this article is a perfectly acceptable alternitive.
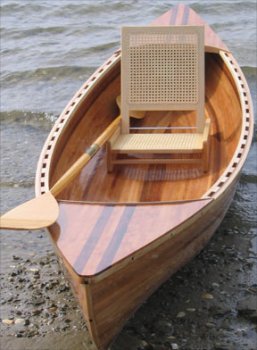
The boat to the left is called the "Nantucket Sleigh" A beautiful little solo boat in its own right, but come on, you have to admit that the little open spaces in the inner gunwales have a certain appeal. In simple terms, scuppers on gunwales are simply intermittent blocks either carved or placed at strategic intervals. Carving your scuppers is no easy task without the right equipment so we won't consider that method. With today's adhesives, there is little need to purchase specialized equipment to achieve this objective.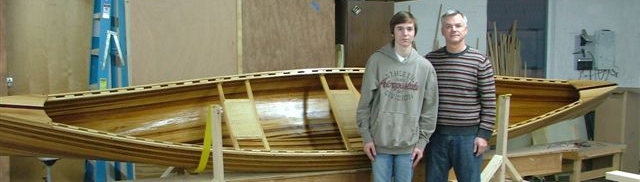
Here is the real bonus. It adds about $10 to the cost of construction and takes about an hour longer to do than if you use gunwales without scuppers. For materials, all you need is one length of gunwale cut into pieces and about 3 oz of epoxy thickened with wood flour. Assuming you are using Ash for your gunwales, that should be about $10 bucks including the epoxy.
 OK, lets get to it. You need to do a little prep work before we begin. A typical canoe gunwale is about 1' X 1/2' or so. So if you haven't milled yours already, you should do so and if they are shorter lengths that are to be scarfed together the you should also take care of scarfing them and finishing off the joint before we begin. In other words, you should have your inner gunwales complete without the scuppers. For scupper material, you should use material with is exactly the same height as your gunwales. If your gunwales are 1" tall then your scupper material should also be 1" tall. this will save you a lot of sanding. the best way to make this happen is to mill up the scupper material at the same time as the gunwale material. Enuf said about that.
 Now you will need to take your scupper material and cut it to size. On the surface, this may seem like a random length and to some extent it is, but you need to consider the seats you will be installing in your boat. In the picture above (with the proud father son team), you will notice that there are three seats in this long tripper canoe. Whether you are buying or building your seats, you will have to consider the separation of the mounting rails for your seats. Typically seats are attached with bolts and if you are attaching your seats in this manner you need to make sure that the mounting hardware will land on a scupper and that the scuppers have enough meat to them to handle the load. Personally, when using scuppers on canoes, I like to use seat risers under the seats rather than use hardware that bolts. Seat risers are a different discussion so in an attempt to keep this from becoming a book lets stick to the subject at hand.
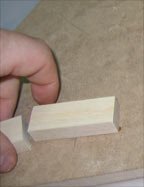
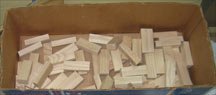
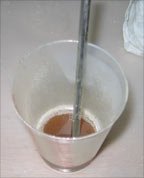
 Making your scupper blocks is as easy as making a mark on your chop saw and having at it. I typically like scuppers either 2 1/2" or 3" long. Use a good sharp finish saw to eliminate any need to sand when done and for goodness sakes watch your fingers when cutting. Cutting 18 feet of little blocks can get monotonous and there are two reasons to keep focused. The first is to end with the same number of fingers you started with, and the second is to make sure that each and every block is identical. If they are not then when you are done your inner scuppers will not align with each other when you are done. Then it won't matter what the spacing is, when you do to mount your seats, or put on the breasthooks, the gaps won't align and it will definitely be noticeable. Get yourself a box full of scupper blocks and we can go to the next step. Like all things which require using epoxy, you want to make sure that you are well prepared before you add the hardener to the resin. You don't want to find out you are 3 scuppers short while you are watching your epoxy set in a cup.
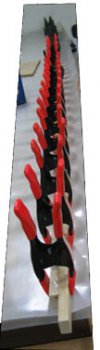
 Now that we have all of our parts ready to go you need to get prepared to make the gunwales. You will need a long flat surface at least as long as the gunwales. Cover the work surface with plastic. Using one of the scuppers as a template, measure off the gunwales using a pencil to mark off. If your spaces and scuppers are the same size, then you simply keep moving the scupper down, marking with the pencil until you run out of gunwale. If the spacers are different from the scuppers then you will need to mark alternately scupper, spacer, scupper spacer and so on. As a side note, if your gunwales are scarfed, I like to start at the scarf and work my way to either end. this covers the end of the scarf and add strength. When you are done marking, you should be able to put the marked gunwales side by side and the marking should align from one end to the other ensuring equal spacing as well as the trouble free installation of the seats and decks.
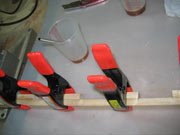 With scuppers, spring clamps at the ready, plastic laid and gunwales marked, we are ready to glue. Using a good quality epoxy glue mix up some resin and hardener. I like to use slow hardener to give it ample time to penetrate the wood but the manufacturer of your epoxy will have use instructions to guide you. Add some wood flour for thickener and mix to about the consistency of a thick maple syrup. You will need to have gloves on to keep that epoxy off your skin as you will be using your fingers to align the blocks. Use an acid brush to spread the epoxy on the gunwale and the back side of the scupper. Use the spring clamp to hold the scupper in place and carry on down the line. Be sure to check each block for flush. If done right you should be doing a simple sanding when done to get off the excess epoxy.
And there you go. A few bucks, a little extra time and and lot of splash. Try it, it is as simple as it sounds.

