18' Great Northern Freighter Canoe - Mounting the Forms
MOUNTING AND ALIGNING THE FREIGHTER CANOE FORMS
Mounting and aligning the forms for this Freighter canoe is not too much different from a typical canoe or kayak build and is covered in some depth in all of our DVD's, so I won't go through all the gory details. You can find all of our boat building DVD's by clicking here.
Like any other boat building project, you need to mark the form locations on the strongback with a perpendicular line at each location to the centerline of the strongback. On the Freighter canoe project, it is simplest to start with the mounting location of the transom and work your way forward.
 I suppose it makes sense to start with the obvious difference. As we showed in a previous post, the transom is mounted on a special support which is well defined in the actual plans. Just like the buttress blocks on a standard form tab, the base of the transom mount needs to have a centerline defined on it. Align the mount to the centerline on the strongback and it should be square. Again, to reiterate, the mount is designed so that if built to the specifications on the plans, it should be a simple matter of setting the transom on the jig and you are done.
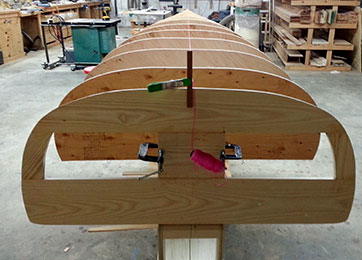
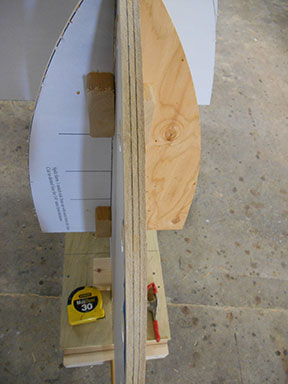
If you look at the picture of the transom to the right, you will see there are a couple of C-clamps holding the trasom to the mount.
Just as a general maintenance not, be sure and sand off and clean up the interior of the transom prior to mounting it. It is far easier to take care of that now then it will be when the boat is stripped. The outside will get glue and epoxy on it as this process goes on, so I wouldn't waste a lot of time on that now. Make sure and transfer the centerline of the transom to the wood before you sand off all of the pattern.
 You will also probably see there is a small stick of wood attached to the transom at the top with a bright pink string attached to it. The Stick is just a way to hold the string for the alignment of the forms. I find it simple to just use a dab of hot glue and put the stick to one side or the other of the centerline of the transom. It is important to make sure that you mount it so that when you wrap the string around it that the string is directly over the centerline of the transom.
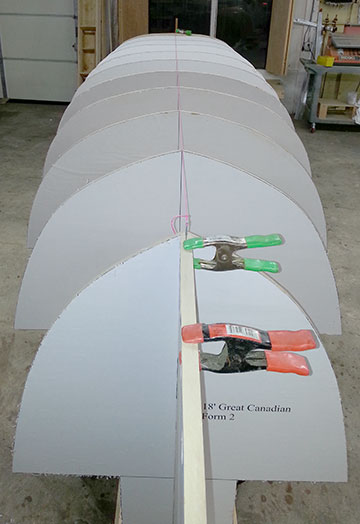
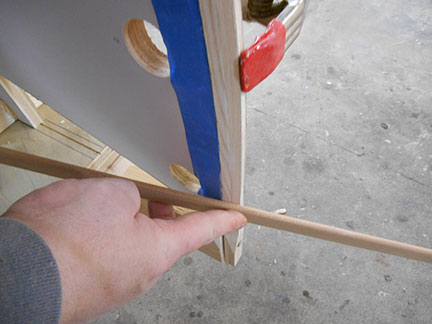
The picture to the left shows the stem form attached and the inner stem mounted, which again is the same as any other canoe build. Using a small brad GENTLY nailed into the end of the stem, loop one end of the pink string from that nail back to the small stick on the transom. Now you will be able to eyeball down the centerlines of each form to get them all centered. I find that it is helpful for me to transfer the centerlines of each form pattern to the top of each form. It just makes it easier for these tired old eyes to see the centers.
It is best to do this process with two people, with one person guiding another to add shims on one side or the other of the forms.
We often get the question about the need to have a level floor. It is absolutely irrelevant how level your floor is. I tell people that you can mount your strongback to the wall and build it on its side if you like. What is important is that each and every form is aligned with the one next to it and they are all centered on the centerline of the strongback. Both of these things can be accomplished without regard to whether or not the floor is level.
There is one other peculiarity to the mounting of Freighter canoe forms, or any forms for any boat that are taller than a typical canoe. If you have spent much time on this site or watched any of our DVD's, we show you how to build small roll around platforms for the building process. Typically we show the platform about 18" off the ground which puts the boat at a good height for most people to strip from sheer to center. This boat however is higher off the strongback than most boats due to the depth of the boat and the rise of the stem. Because of that I recommend lowering the platforms. We have a set in the shop for just such an occasion which with the 4" wheels stands just 10" off the ground. They put this boat at just the right height for my 5'8" frame.
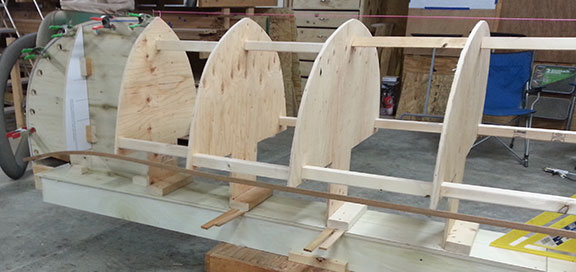
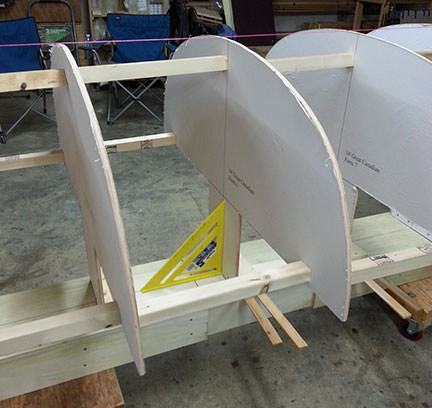 The picture to the right basically shows you every aspect of mounting the body forms of this freighter canoe and again, all of the offsets for the mounting are found in the table of offsets of the freighter canoe plans.
So taking them one at a time, lets go through the steps. Assuming you have already made your Buttress blocks and properly attached them to the forms, and the strongback, the only added requirement to this boat, or any larger boat such as the Whitehalls, is the shoring up of the forms. This can be done in a number of ways, and we typically show just using some scrap strips and stapling them at 1' intervals around the forms to get them at exactly the right separation. Here I am showing you a slightly different way. I took a 2X4 and ripped it down the middle, then cut them at the appropriate width so that I could hot glue them from one to the other all the way down the boat. Assuming that your stem and the first full body form are sitting perpendicular to the strongback, you can start at that end and work your way to the transom. Note the "rapid" square in the picture. It is important that not only are the forms the right distance from one to the other but that they stay absolutely perpendicular to the strongback. By doing this process, you have a stiff skeleton to work on as well as be assured that they forms will not twist over time as you are stripping the hull. Just as an example, these forms are separated by 18" from forward face to forward face. Because the forms are made from 1/2" plywood, I made all of my spacers 17 1/2" long. Doing this method is also a good second check to make sure all of your forms are spaced correctly. If you put the spacers in and the form is no longer squared up at the tab, then something is going wrong and you need to stop and find the problem.
 You will note that there is not easy way to get a spacer from the last body form to the transom. Don't worry about it because as I have said a couple of times, if you made your transom mount correctly and put it at the right spot on the strongback it should be exactly correct.
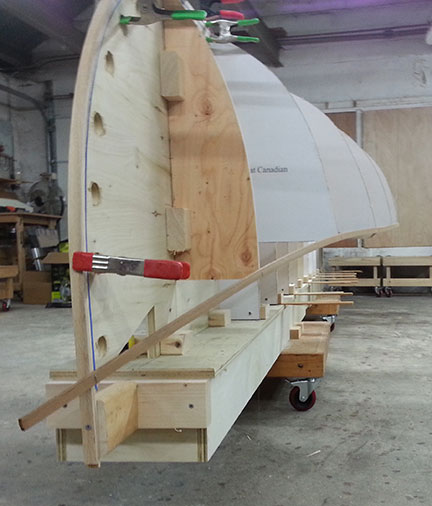
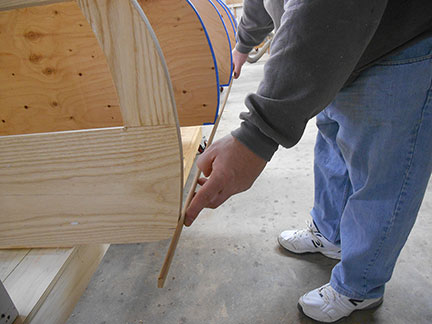
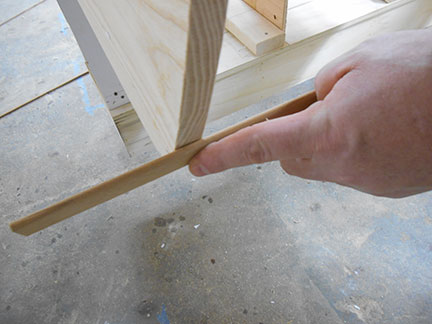
Getting to this point has been a good days work, and I was just ready to turn off the lights and leave the shop when the front of the boat caught my eye. This boat has a good deal of swing in an upward direction at the stem. I had to know before I turned the lights off if this was going to be a problem on the sheer strips, so I decided to put a strip on before leaving for the day.
As you can see from the picture, the bend went well, though it did need a bit of encouragement.
I should also note that this particular freighter canoe has a split form on the stem which is mounted with hot glue and buttress blocks in the same way that we would do any other boat.
The next steps will be to shape the stem and the transom and tape everything up to get ready to strip the hull.
SHAPING THE STEM AND TRANSOM
Now that everything is aligned and firmed up, we are almost ready to strip. There are just a couple of more items to take care of.
 Shaping the stem whether it is for a large freighter canoe or a small solo canoe, the objective is exactly the same, you are creating a flat landing spot for the strips as they come around the bend of the body forms.
Before we can shape the stem, we need to make some registration marks where it is ok to take wood and more importantly, mark the boundaries where it isn't OK. The marks are different for different boats. For example, When we build dories here the stems are 2" thick and therefore the dividing lines are not going to be the same for a kayak or canoe which has a stem 3/4" thick. You should always refer to the plans to see if there are any special instructions on the dimensions of the stem and the bevels, however if there are none, it is safe to assume with out plans that you should divide the stem in thirds. You can see from the picture that the stem is indeed divided into three equal parts. I use a carpenters square which in this case is set to 1/4" depth and simply trace down the stem on either side with a good sharp pencil. You want to make sure your pencil is sharp so that the lines don't become so thick that it actually makes a difference in the size of the bevel. Remember that you are only working with 1/4". Now with the boundaries set, we can go ahead and bevel the edges.
 There are many ways to accomplish this, however for those of you who own one of our DVD sets, you know that I am not a traditionalist and am in favor of power tools when they fit the job. For me, I can take a belt sander and get the stem to shape in just a few minutes with a 50 grit belt. I will say this though that setting 50 grit paper on a belt sander will take wood quickly so make sure you are comfortable doing this before you put the sander to the wood. A good rule of thumb is to always keep the sander moving and never take your eyes off the wood while beveling. Keep the sander pointed directly at teh form prior to the stem. In the case of this freighter canoe, that means the split form on the stem form. By angling the sander to the edge of that form, it ensures that the landing will be just right for strips coming from that forms edge.
 So why is this important?, It may not seem like a critical thing to do with todays epoxies and exotic cloths, however, not having a smooth landing spot for your boats planking will cause either unwanted gaps at the stem, or worse a bulge in the planking as it approaches the stem. Either case is undesirable and easily avoided. If you are not comfortable with a belt sander, then use a wood rasp and just like the sander, point it at the preceding body form to get the angle. It may take a bit longer, but it is less stressful for builders not ready to pick up the belt sander.
Checking your work is a simple matter of using a small strip of wood or a batten and push it up against the forms leading into the stem and the stem to see how it looks. If it lands flat with no spaces or bulges, then you have done what you needed to do.
Shaping the transom is necessary for a couple of reasons. First it is not the same shape in the case of this boat as the form prior to it and second and more importantly, it is angled at a 12 degree rake to accommodate the engine. Both of these things will necessitate shaping the transom so that you have flat landing zones. The process is accomplished the same way as the stem but the angles can be a bit trickier to follow. Just remember to keep your cutting tools, whether sander, rasp or whatever pointed directly at the form preceding the landing area and you will be fine. Above all, remember the cardinal rule of woodworking. You can always take more off, but it can be darn difficult to put it back on.
 One final note: I typically do not shape the entire stem or transom before beginning the stripping process. I typically do enough to get 20 or so strips on each side and them come back and do some more. This allows me to be more aware of the changing of the curves and to know exactly where the strips are coming from before they land on the stem or transom. It is easier to make small adjustments if you are doing smaller areas.
There is one last task to accomplish before you can begin to strip. Take some time and put painters tape on all areas the strips will com in contact with except the stem and the transom. You will be going through at least a gallon of glue on this project and you want to make sure that none of it is gluing the boat to the forms. If you put tape on all of the form edges, they will knock right out when the time comes. You also want to get some tape around the sides of the stem form where it comes close to the inner stem to make sure that the inner stem doesn't get glued to the stem form. There should already be tape on the edge of the stem form from when you glued up the inner and outer stem pieces, however if it was damaged in any way, be sure and get good coverage now or you will regret it when it comes time to pull the form from the hull.

