18' Great Northern Freighter Canoe - Stripping the Hull
STRIPPING THE FREIGHTER CANOE
 Well this is the part that most people want to get to. Understandable, this is the first point where you start to feel like you are actually building a boat. I could put a lot of text here to try to fill space for pictures, but that would be pointless for this boat as the stripping is pretty uneventful. So here are a few pointers to keep in mind.
If you have a table saw, then go ahead and rip the cove off the first strip. It will make it a little easier to align the strip with the sheer of the hull. If not, it isn't a big deal, just try to be consistent on the shear. The forms edge is pretty much a perfect curve so you want to make sure that you follow it. Any undulation in the curve for the first strip will be amplified and carried throughout the entire hull, so step back after the sheer strip is on, get on your knees at the stem and follow the curve around the hull to make sure it looks smooth. Better to fix it now than curse it later.
Make sure that your sheer strips hit the stem and the transom at the exact same height, and try not to glob too much glue on the stem and transom so that you don't have a big mess to clean up later.
 You will have to be gentle on the first few rows because there isn't much holding the strips in place just yet. This boat will have a painted hull, so there is little benefit to stripping without staples. If you want to strip your hull without the use of mechanical fasteners, we have an article to help you out with that on this site. We have a DVD which covers using staple-less construction as well as some advanced bending techniques for strips. It is for our Whitehall boats, however all of the information is directly transferable to this project. In fact there are a number of techniques we will be using on this boat which you can find in our Whitehall and Wherries DVD set.
Constantly check all along your strips to make sure that you have a good fit on your bead and coves. About every hour so, stop on the side you are working on and use painters tape as shown in the pictures to draw the strips tight together until the glue dries. That brings me to another point. You never want to get one side too far ahead of the other or you may begin to twist the stem or transom.
 Bottom line here is to take your time. A boat like this one may be large, but that actually makes it easier to strip than say a 10' kayak. The curves are wider and slope more gently. The real work starts on this boat when the strips are all on, so take your time and enjoy this part of the journey.
You should cut the strip ends off the stem and transom every few strips so that you don't catch them when walking around the hull. You will want a very sharp blade that will not tear at the wood and do not get impatient as it will just make problems you will have to fix later.
If, like me you own an oscillating tool there put a fine blade on it and let the tool do the work. It is fast and very, very accurate leaving no tear out as long as you don't push the tool through the wood and let the blade do the work.
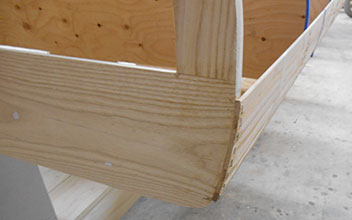
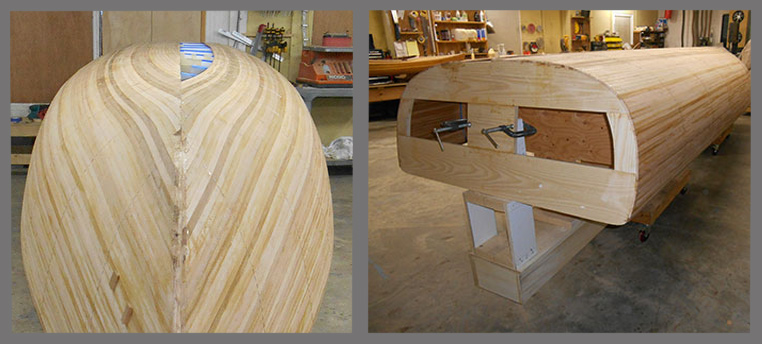
If you take a close look at where the strips meet the freighter canoe stem and transom, you will note that there are no gaps or bulges or empty voids. This is a sure sign that the beveling process went well and you should keep your eye on that as you go along.
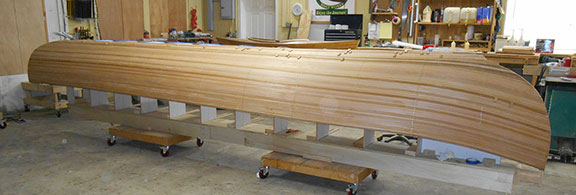
Here are a few more pictures for you. This shows the boat at 40 strips with about another 100 to go. For now it needs to rest and harden up so that I can continue to shape the freighter stem and transom.
MORE STRIPPING
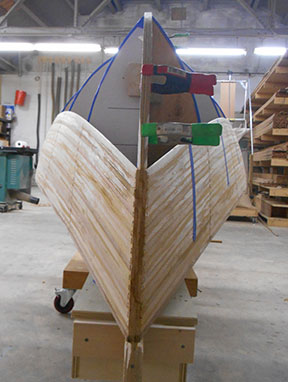
I was almost hoping that there would be some special circumstance that would come up during the stripping of this hull, but the fact is it stripped up without a hitch.
The only things of note during the stripping to get to the point where one side was completely done was an area about 3 or 4 inches down the stem where the turn started to fight back just a little bit. For those of you who have our Whitehall or Kayak DVD's you know that you can use a heat gun and a wet rag to beat those strips into submission. We didn't feel the need to do that during this build, but if it starts to fight you a little too hard, 30 or so seconds with a heat gun should take care of the problem.
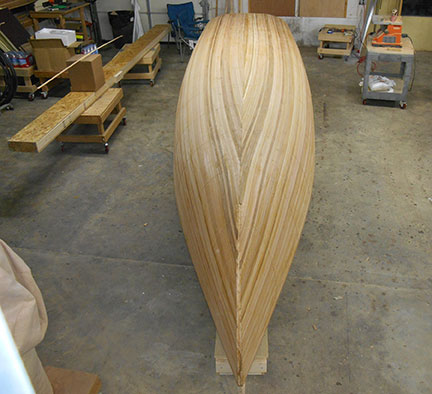
As you can see from the final pictures of this stage, we are lapping the strips from one side over the center line and then we will let that set and make our cuts. For this boat it is a waste of time to do any particular design on the bottom of the boat for three reasons. First, we will have a keel on this boat and second, the outside will be painted lastly, there will be a floor system put in the boat which will block any visibility inside the hull.
As a last note, I would add to make sure that you continue to put balancing strips on both sides of the hull as you strip until you get to the point where you are pretty much at the point where you expect to cut the notch for the outer stem. Then you can go ahead and strip one side right on through. This will make sure that your stem won't twist one way or the other.
CUTTING THE CENTERLINE & STRIPPING THE OTHER SIDE
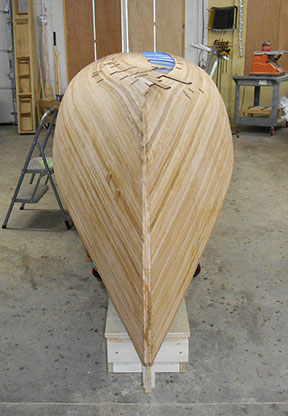
 Well our freighter canoe is coming along just fine. I want to take a few moments here to try to describe the theory of where do you cut for the outer stem as it seem to be the thing that throws people the most.
In a nutshell there are are really only two things that you need to remember when figuring out where to make your cut for your outer stem.
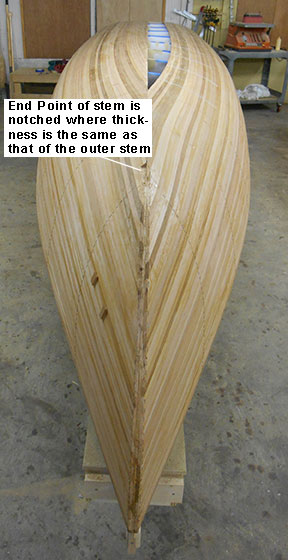
- The other stem never (ever) goes past the inner stem. Depending on the shape of your hull, the ending point of the outer stem will vary greatly. In general the wider and flatter the bottom of the hull, the father down the inner stem the outer stem will stop.
- Second, the place where you make your cut should be at or as close as reasonably possible to the thickness of the outer stem. That is to say, when you cut the notch, the width of the nose of the boat should be the same thickness of the outer stem. In our case, the outer stem is 3/4" thick, so when we cut and flatten nose of the boat and measure across, it should be 3/4" or just slightly higher than that. If it is slightly higher, a light sanding or filling of wood flour and epoxy will take care of any small discrepancies. What you really need to be careful of is cutting it so high on the inner stem that not only is too wide, but the strip walls become so thing that you compromise the stem of the boat.
So, what is the best way to make sure you don't make a mistake. Easy remember the cardinal rule of boat building. You can always take more off, but it can be darn hard to put it back on. Take small nibbles until you see that it is widening out more than the width of your outer stem and then stop there.
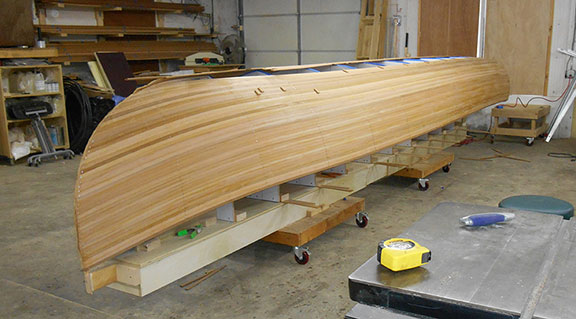
Cutting the center line of the hull was accomplished using a multi-tool with a find cut blade and a straight batten was temporarily hot glued down the center of the hull after a string was pulled to find the center line. Pull the string by putting a small finish nail in the center of the inner stem and the center of the back of the transom framing and pulling a taut string. By putting a batten on the line, you can run your cutting tool right along the edge for a perfect cut.
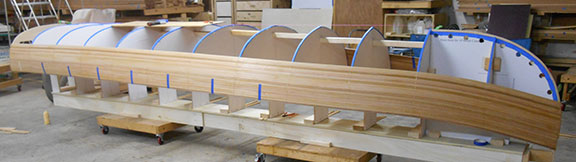
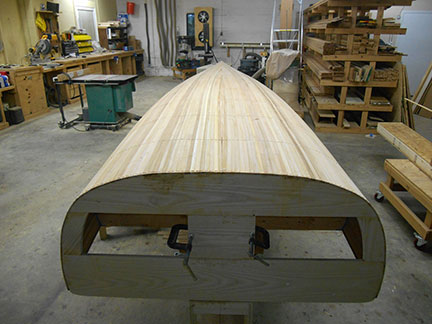
Once your center line is cut, it is a matter of backfilling all of the strips for the other side. There are some very specific techniques which are too detailed to get into here, however the DVDs cover them in depth. I will say this though. In many of these pictures you have seen an oscillating spindle sander in the background on a wheeled cart. In fact one of the is in the background of the above picture. These, or some kind of stationary bench sander will make for quick and accurate fitting of strips along the bottom of the hull.
Here is where we left the hull for the night. There are just about 10 strips left to go and we should be able to take care of that tomorrow.
LAST STRIPS IN THE FREIGHTER CANOE
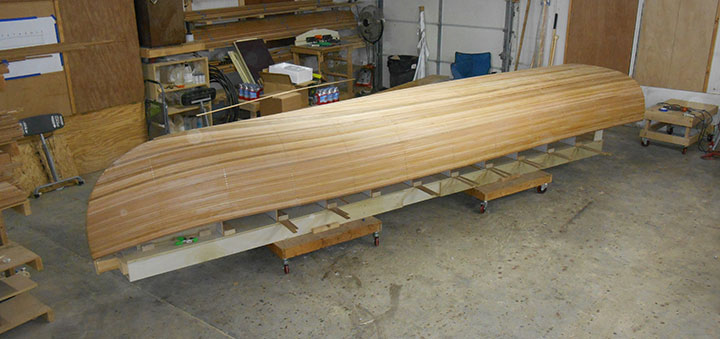
 We left off the last post with just a few strips to go. Right around the time of the last post, I began to realize that the final strip was going to be long and thin. If you are looking to avoid this, then you cannot start at the sheer and work your way down. You will need to start by putting in a strip parallel to the strongback and then go back and fill in the stem and at the transom.
I don't recommend doing that really for this boat as it can get a bit messy at the transom. The last strip the way we stripped the hull was about 5 feet long and was about 1/2" at the widest part. Not really that big of a deal really, it goes in just like a shorter strip would go in, just work it a few inches at a time until you are there.
Most newcomers to this type of boat building will scrap a few attempts before they finally get the one they want.
 Patiences is called for here, however if you feel like the strip is too long and delicate to get in one shot, you can go ahead and give yourself a break and scarf the strip in the middle by putting a 60 degree cut on the end and a matching cut on the mating strip. Be sure and make the cut before you start to shape the strip so that you get good mating ends. This is a fairly common technique for people who cannot get strips the full length of a hull.
That last thing I would say is to not shape it too thin. You really shouldn't put the strip into place until you are ready to glue it down. Just shape it and test it enough to convince yourself that it will go in with a little persuasion. When you put glue on the strip it will slide in a bit easier as the glue will act as a lubricant.
If you are working alone, you may want to consider putting some glue blocks inside the hull and between the forms to keep the strip from pushing down through. If you have another set of hands at the ready, they can push from underneath while you push down from the top.
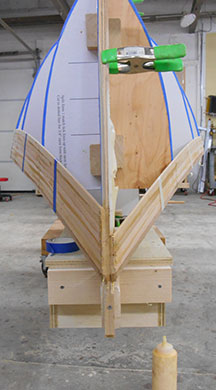
TAPING THE INNER STEM
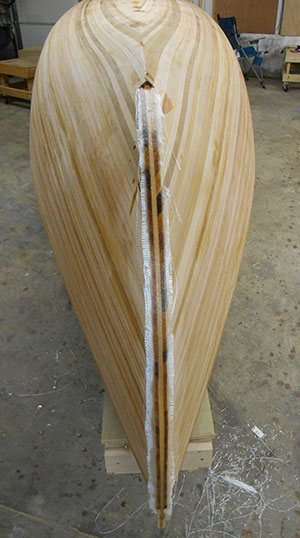 I realize that this step is something that not everyone does, however I am a firm believer that the 15 minutes that it takes to accomplish this step is well worth the time. I do this for every canoe, but it is particularly important for this boat. A freighter canoe is a a big canoe that will motor driven and regardless of our best most careful efforts, you will likely hit the dock a bit too hard some day on your way in from the fishing trip.
Before this boat is done, I will reinforce the stem in a number of ways. The issue is really any direct and forceful impact head on. When that inevitably happens you want to make sure that the only thing holding it together is not yellow woodworking glue. The problem is simple enough to plan for though. The first step is to bind the two sides together with a tape job of 10 oz e-glass down the front of the stem. We will also tape the inside of the hull when it is flipped as well as put on an outer stem for the freighter canoe and glass right up the sides of the hull and stem pieces which will tie it all together nicely. All of that combined with the deck which ties the two sides together gives a nice strong bind on what would otherwise be a trouble spot.
 For now lets tackle the first step which is the tape job. The first thing you need to do is sand down the bitter end of the stem and the strips to get a good flat edge. Be careful not to angle the end or round over the edges. You want to keep the surface flat and parallel to the end of the strongback. In fact use the end of the strongback when sanding the end of the canoe as a guide. I use a belt sander for this task, however if you are not comfortable with that particular tool, you can use any sander to get the job done. Just remember your objective is to sand a flat surface, not shape the stem. Any shaping should have been done by this point.
Hopefully when you shaped the inner stem before stripping you were able to get the angle right and now when it is all stripped up you are looking at a stem which is solid and has no gaps. If you have a spot or two where there is a gap between the end of the strip and the stem, then that needs to be taken care of now before you go any further. To fill the gaps in the stem, just mix up some epoxy and wood flour about the consistency of peanut butter and fill those holes, and when dry sand them flat.
Once you have a stem with no voids, mix together about an ounce and a half of clear epoxy and with an acid brush or small chip brush. Now with a cut piece of 10 oz cloth about 1.5" wide and long enough to go from the end of the stem to where the bottom meets, use a gloved finger to spread the cloth onto the boat stem. Now gently take your brush and add clear epoxy all down the cloth. Not too much, just enough so that you can use the gloved finger again to spread it all along the cloth. Be careful not to get epoxy on the hull and if you do, wipe it up so that it doesn't dry there.
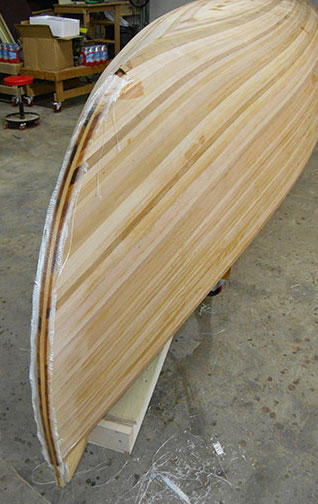
APPLYING THE OUTER STEM
Now that all of our strips for our freighter canoe are in place and the stem is ready to be worked, we can go ahead and do the finishing touches to make ready for applying fiberglass to the hull. Before we move on, you will need to have rough sanded the hull using 80 grit. Rough sanding will expose any issues that will need to be addressed. Be very careful of that now hardened tape on the stem of the boat. The edges are very sharp. You can trim that up with a razor knife and finish it up with the sander hitting the edges. DO NOT run your fingers down the edges until you have done this.
 We need to dry fit and then permanently apply our outer stem and fill any imperfections in the hull. Having done so many of these and not wanting to waste any epoxy, I typically like to apply the stem and then use the rest of the epoxy to fill any voids.
In order to apply the outer stem piece to our freighter canoe we will first have to dry fit it. DO NOT skip this step. It may seem silly to you, but it is much simpler to fit and place your stem piece when there is not epoxy dripping off the back of it.
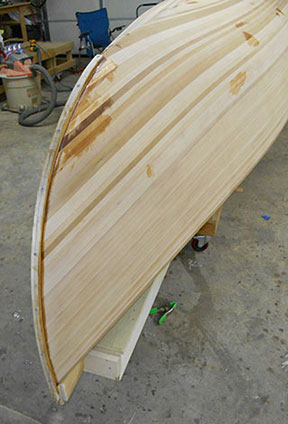
First, if you have not already done so, go ahead and sand with a coarse sandpaper the inside and sides of the outer stem. The inside needs to be clean but roughed up for good adhesion and the sides are much easier to sand before you put it on the hull.
You will have to pre-drill all of your screw holes so that you don't crack the stem when putting it on. I typically put my first hole about 1" from the bottom of the hull and then every 6" after that until I get to the sheer line of the boat. Start by getting your carpenters square and setting it to 3/8" depth and draw a center line down the outside of the outer stem and measure and mark your screw hole locations. Before you drill anything put the outer stem up against the hull and be sure that your second to last hole mark is at least 2" below the sheer line and the last hole is at least 1" past the sheer line. This will allow you to hold it tight while making sure you don't have a screw hole pop up when you flip the boat and begin your trim out. Once you are happy with the location of the screw holes you can use a punch to start the hole and then drill them out with the appropriate drill bit.
A couple of things to keep in mind here. First off, I do not like to ever leave mechanical fasteners in a boat which server no purpose. The only purpose of these fasteners are to hold the stem in place while the epoxy dries. Because of that there is no reason to countersink them and the drilled holes should be comfortably large so that there is no chance of splitting the freighter canoe stem piece. These screws will be taken out after the epoxy is dried, so use a good quality, strong steel screw. A good deck screw will do the trick. Cheap screws have a tendency of spinning off the heads and leaving the shank buried in the wood when epoxy is involved.
 Now go ahead and screw the outer stem into the inner stem using 1 1/4" screws but just snug them up, don't crank them down. Be particularly careful to keep the stem centered as you are screwing it down. There is a couple of reasons to dry fit. First to make any mistakes before you apply epoxy and second, the screw holes you make now will act as a guide when you finally do screw it down with epoxy.
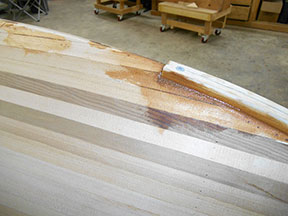
Now back off the screws and you should see a nice line of holes down the inner stem. The screw will have made a small mound at every hole, so just take some 80 grit and sand that down flat again. Now it is just a simple matter of mixing up some thickened epoxy about the consistency of a yogurt and applying your stem. Before you thicken it though, brush some clear epoxy on the inside of the outer stem and give it a few minutes to let it penetrate. While that is happening, go ahead and add your wood flour and paint about a 1/16" layer of epoxy all along the inner stem of the boat. Now go ahead and screw that outer stem back on there. Again, the holes you have already made should guide the stem right back down to where it was dry fit. There is no reason to over tighten here. If you do you will likely either strip the hole or crack the stem, so just snug it up until you the epoxy oozes out all along the edges.
Now with a gloved hand, spread the filler that oozes out all along the edges to make sure there is a smooth transition from the hull to the stem along its entire length. If done correctly, the fiberglass will flow smoothly from the hull right up the side of the stem.
Any extra thickened epoxy can now be used to take care of any flaws you may have found on the hull of the boat while rough sanding. Unless you were darn lucky this will at the very least include where the final strip was put in and any places where there may have been chip out of a cove. If you used good quality strips there shouldn't be too many places to take care of.
AN UNEXPECTED TWIST
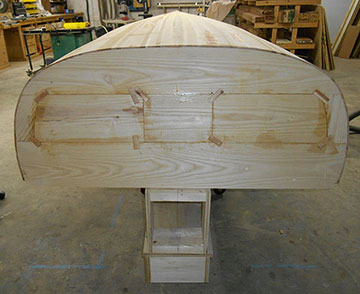 So here is one we didn't plan on but rather than just having you guess about what happened, I figured I would share with you what is going on.
This particular boat we are building will be going to a gentleman in Texas and he asked us to make the transom framing into a solid structure. This is purely a matter of taste. Traditionally, the transom on a freighter canoe would have been framed out, however most modern hulls are solid plywood. Well we aren't using plywood anywhere on this boat other than the strongback and the framing of the transom is Ash.
No worries, just need to fill the holes. We know from our freighter canoe plans that the holes are exactly 7" tall, so it is a simple matter of cutting blanks that are 7" tall, holding them up to the holes and tracing from the inside the curve along the edges. A careful cut along the lines and a light sanding you you have perfect fillers.
Gluing is a bit tricky because there is virtually no way to clamp them in, however remember that we will be planking over the outside of the transom. On this particular hull we will be using Sapele for that. Because we made fillers with a good snug fit, we can simply paint thickened epoxy along the edges of the framing and fillers.
The only trick is how to hold them in their proper place. For that, we put some glue blocks on the inside of the holes held in place with hot glue and exposing tabs to stop the fillers from falling through or even moving for that matter. Once the pieces are in place, we attached more glue blocks to the outside to hole them in and keep them from inadvertently pushing out.
It is well worth your time to get up underneath there and clean up any epoxy which will seep through as well as the outside. As with any epoxy job, it is much easier to clean up than it is to sand up.

